Install AI Prompt Assistant
Choose the package that fits how you prefer to use Windows. Both packages contain the same main application features.
Installer package
Best for most people. It installs the app normally and adds the usual Windows shortcuts.
Portable package
Best when you want to extract the app into a folder and run it without a traditional installation.
Installation steps
- Open the latest release and download the Windows installer or portable ZIP package.
- For the installer, open the downloaded file and follow the prompts. For the portable package, extract the entire ZIP first.
- Launch AI Prompt Assistant from the installed shortcut or by opening ai_prompt_assistant.exe in the extracted folder.
- Keep the application files together. Do not move only the EXE out of the portable folder.
Confirm that you downloaded the file from the official release page. In the SmartScreen window, choose More info, check the application name, and select Run anyway only when you trust the download.
Your first launch
The quickest route is the Free provider, which lets you try chat without entering an API key.
- Open the app and choose Chat from the navigation.
- Open the workspace sidebar if it is not already visible.
- Choose Free under API Provider.
- Choose a Free Route, fetch the available models, and select one model.
- Type a message and send it. You can attach an image when you want the model to analyze it.
You do not need to configure Ollama, LM Studio, or a paid cloud account for your first test. Those options remain available later.
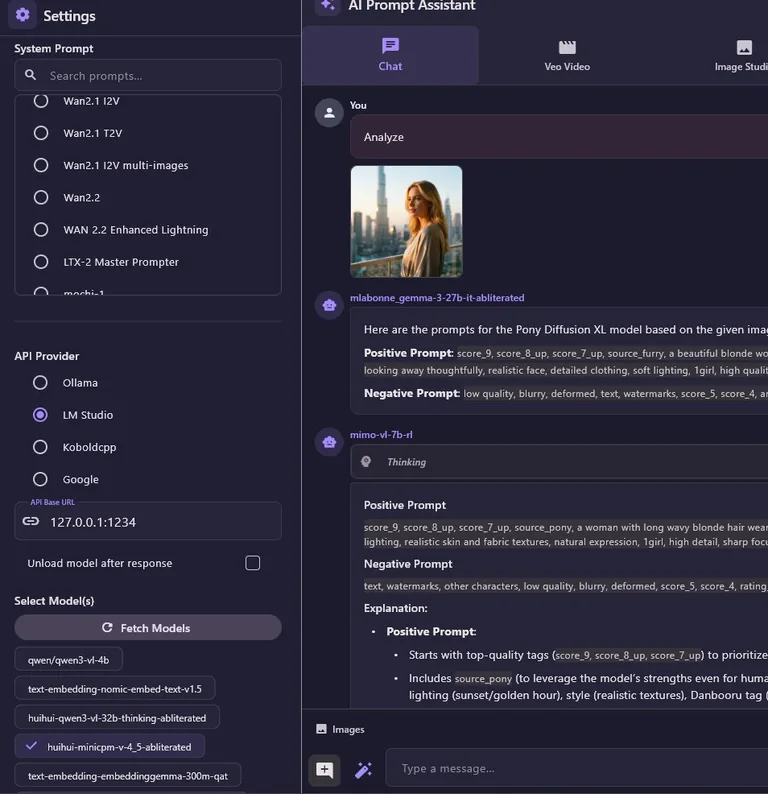
Know the workspace
The main navigation separates each type of task while the sidebar keeps providers, models, prompts, and saved work close at hand.
Home
A visual starting point with shortcuts to the main studios, prompt tools, and creative examples.
Creative studios
Chat, Image Studio, Video Studio, and SVG Studio each provide controls designed for that kind of result.
Prompt tools
PromptFill, Libraries, Prompt Builder, Prompt Director, and refinement tools help you move beyond a blank prompt box.
Workspace sidebar
Choose the provider and model, manage conversations and sessions, and open API Settings when you need to connect another service.
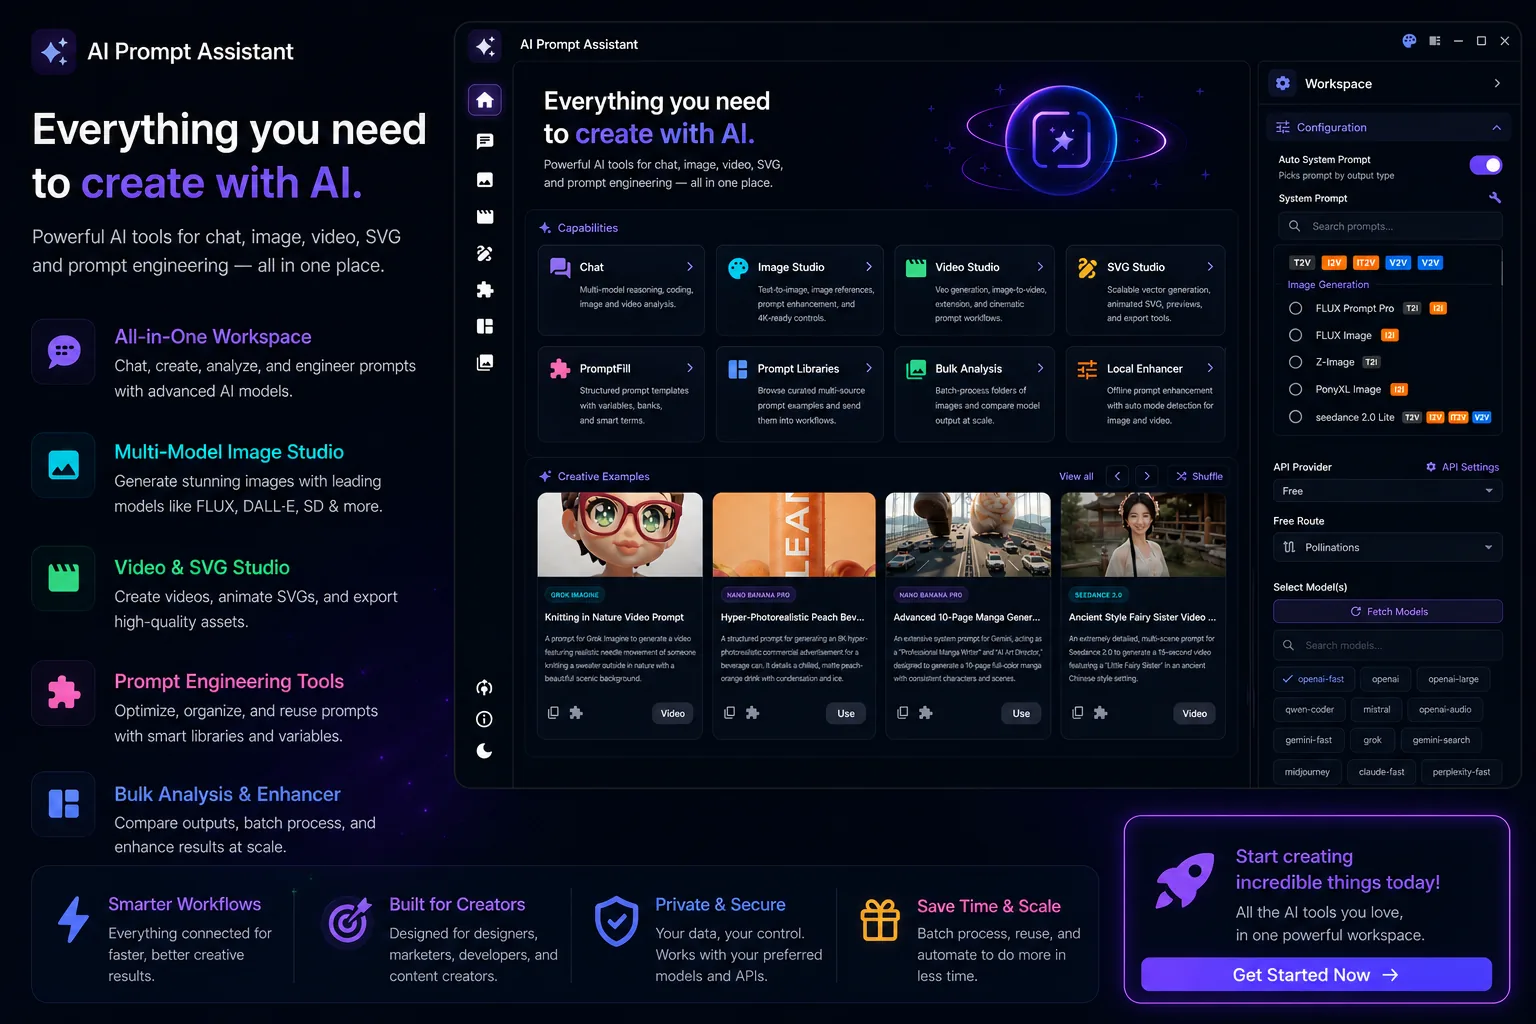
Chat and analyze media
Use Chat for questions, writing, prompt improvement, media understanding, and comparing different model responses.
Start a conversation
- Choose a provider, fetch models, and select one or more models.
- Choose a system prompt or leave the automatic option enabled.
- Type your request. Use the attachment button to add images or supported videos.
- Send the message, then copy, regenerate, or compare the answers. Conversations are saved so you can return later.
Analyze an image or video
Attach media and explain the result you want. A clear request such as “describe this image as a generation prompt” produces more useful output than a single vague word.
- Ask for a caption, tags, a detailed description, or a reusable generation prompt.
- Select more than one model when you want to compare interpretations.
- Use Bulk Analysis when you need to process a complete image folder.
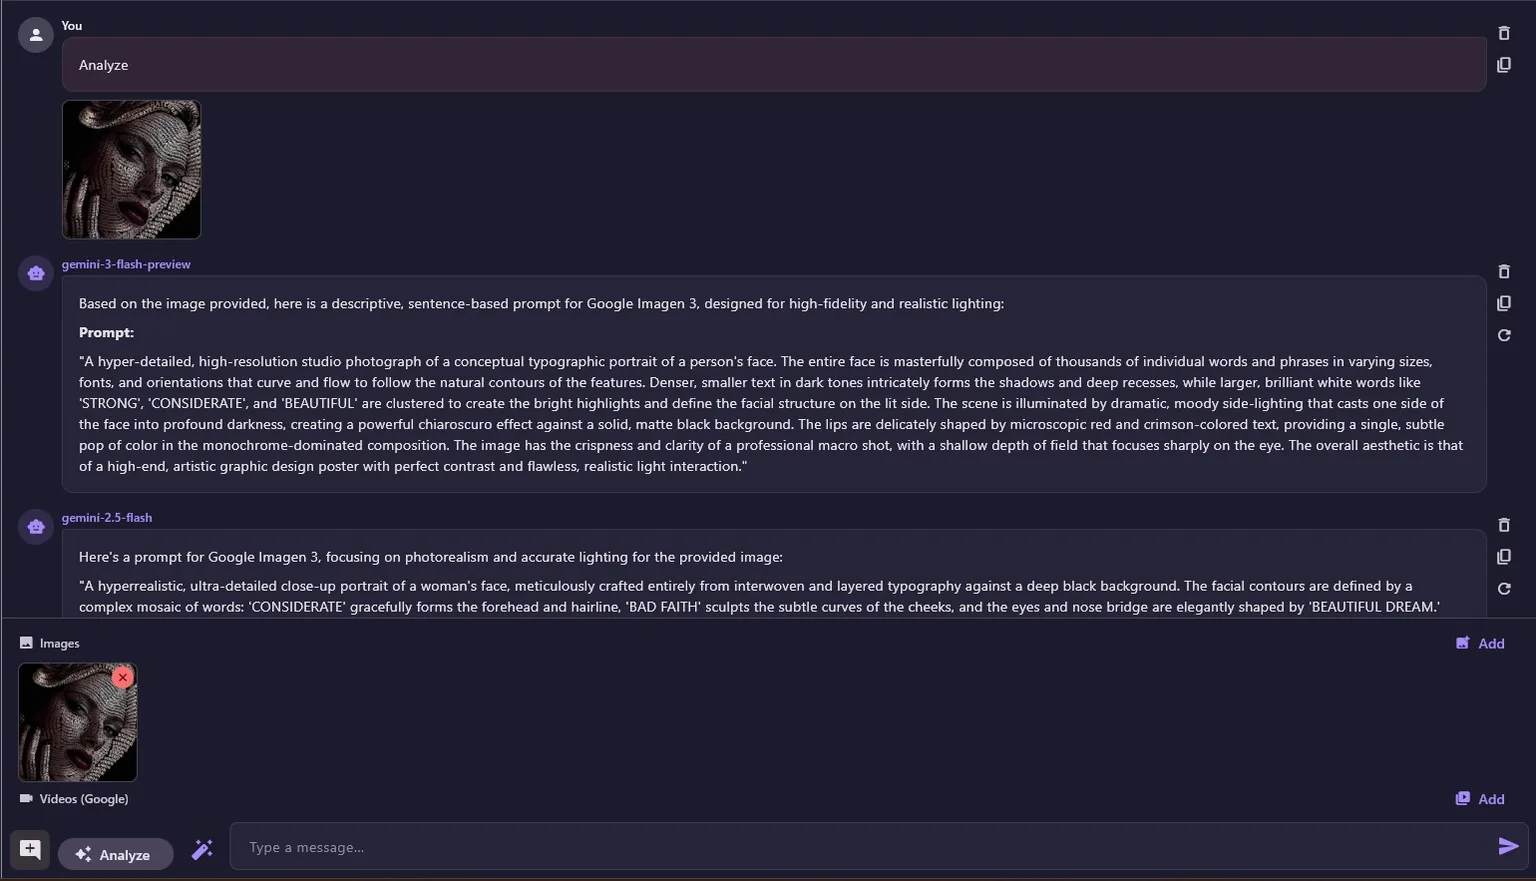
Create images and video
The media studios combine generation, preview, saving, and reuse controls in a single view.
Create an image in Image Studio
- Open Image Studio and choose text-to-image or image-to-image mode.
- Choose a supported model, aspect ratio, and resolution.
- Write a prompt, use Surprise Me, enhance the prompt, or attach a reference image.
- Generate the image, save it, or use the result as a reference for another variation.
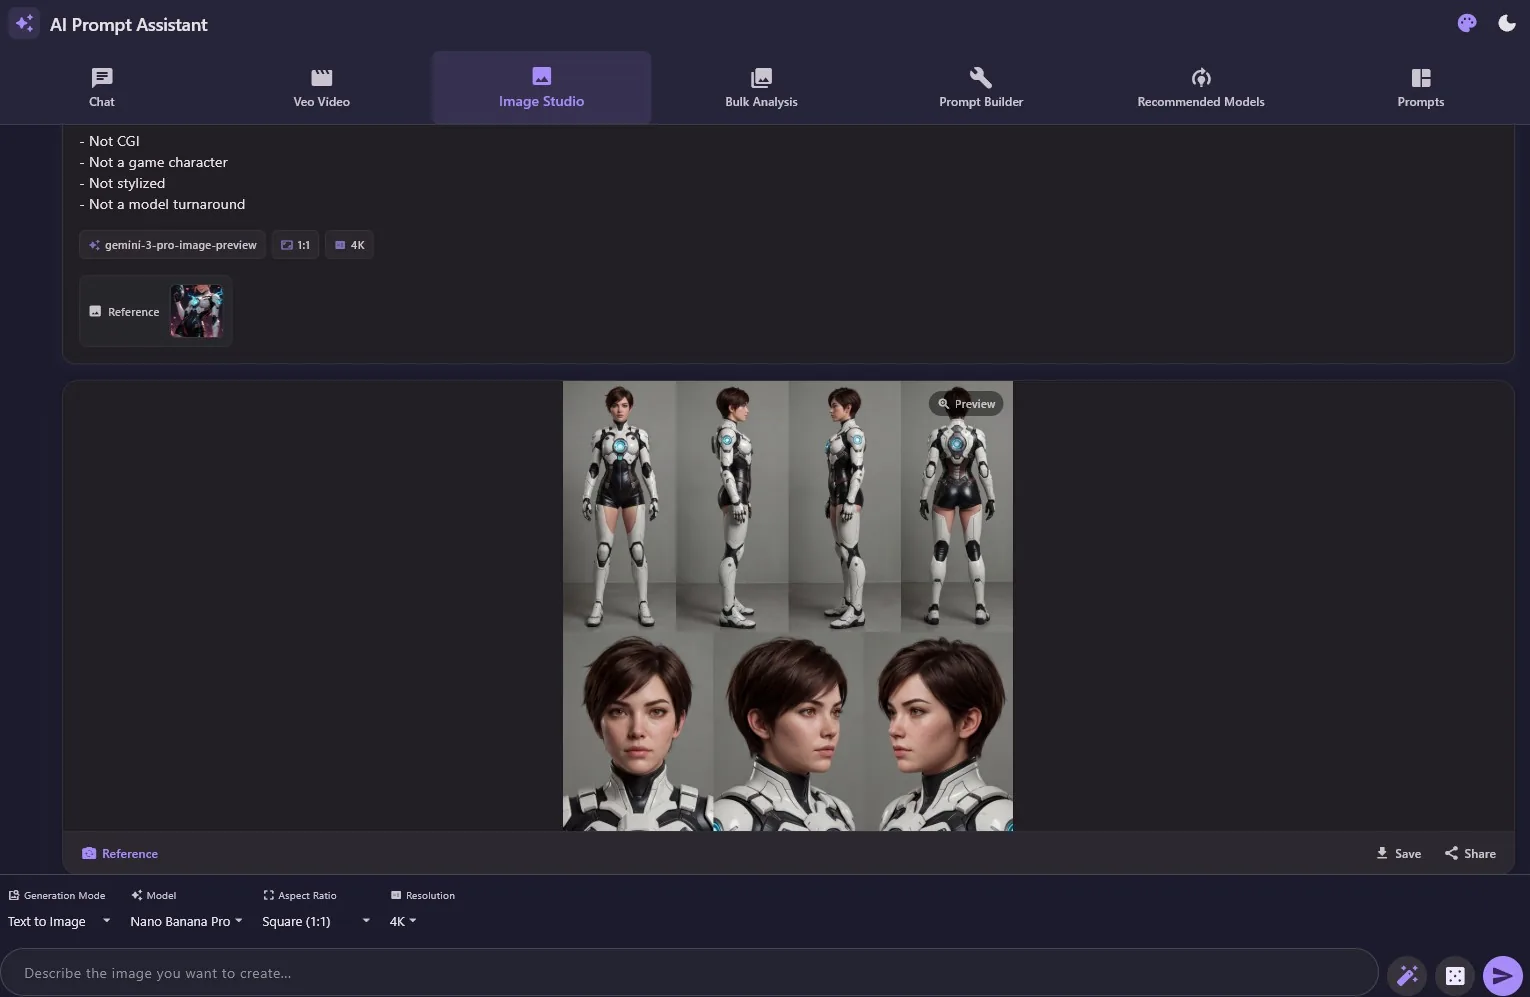
Create or extend a video
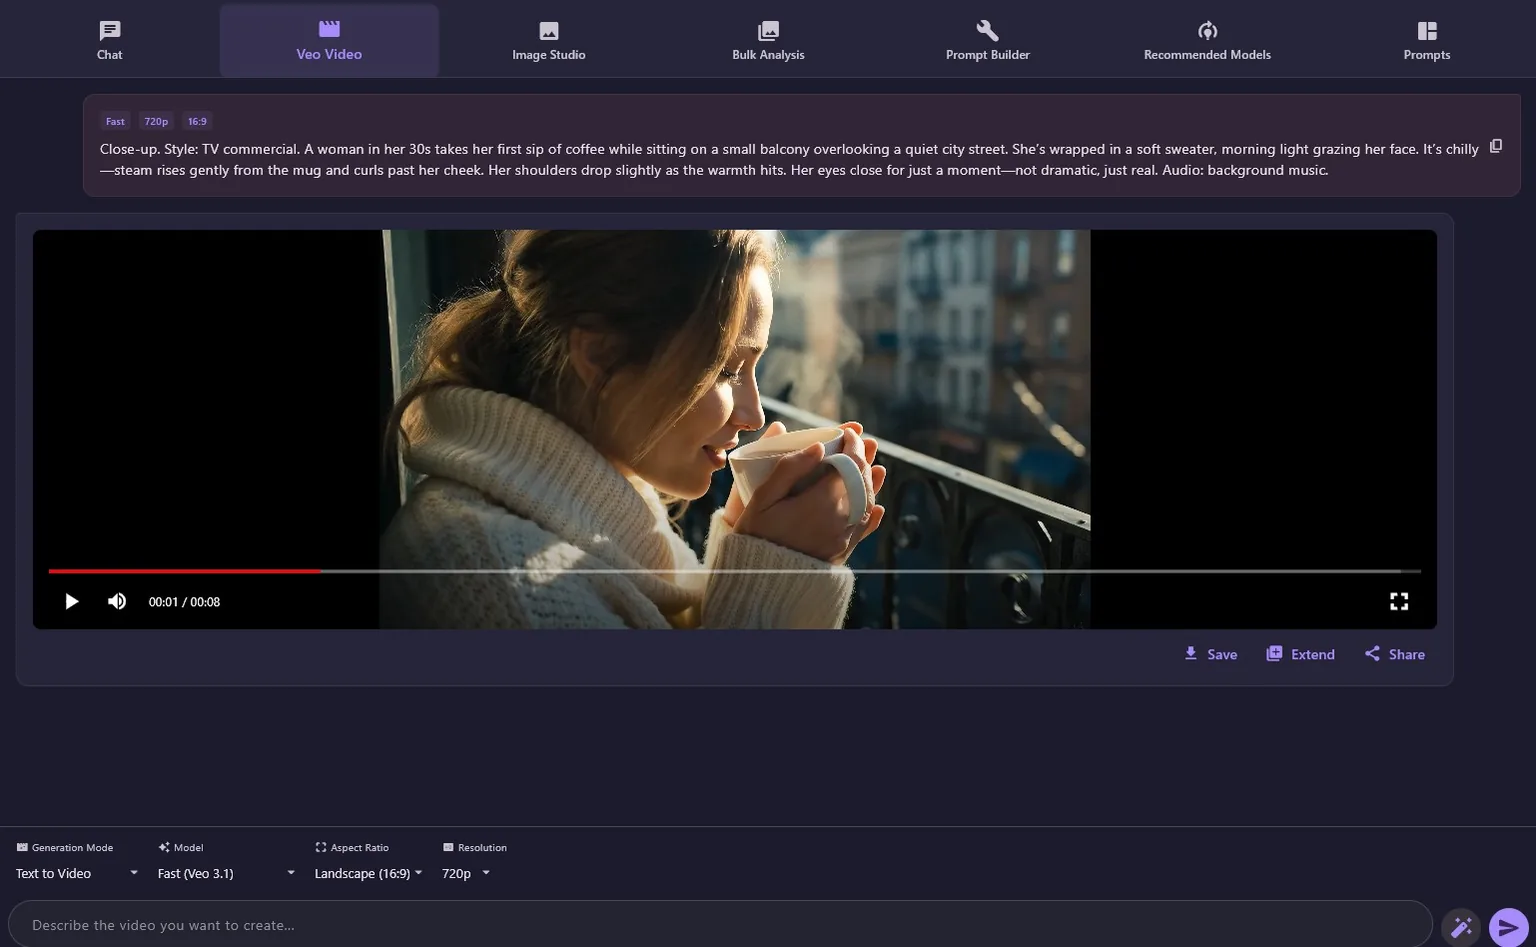
- Open Video Studio and choose text-to-video, image-to-video, or video extension.
- Attach start or end images, or an input video, when the selected mode needs them.
- Choose the aspect ratio and available quality, then write or enhance the scene prompt.
- Generate and preview the clip. Save it, or choose Extend to continue the scene.
Find, fill, and improve prompts
You can start from inspiration, customize a template, build a prompt with controls, or ask the app to refine a rough idea.
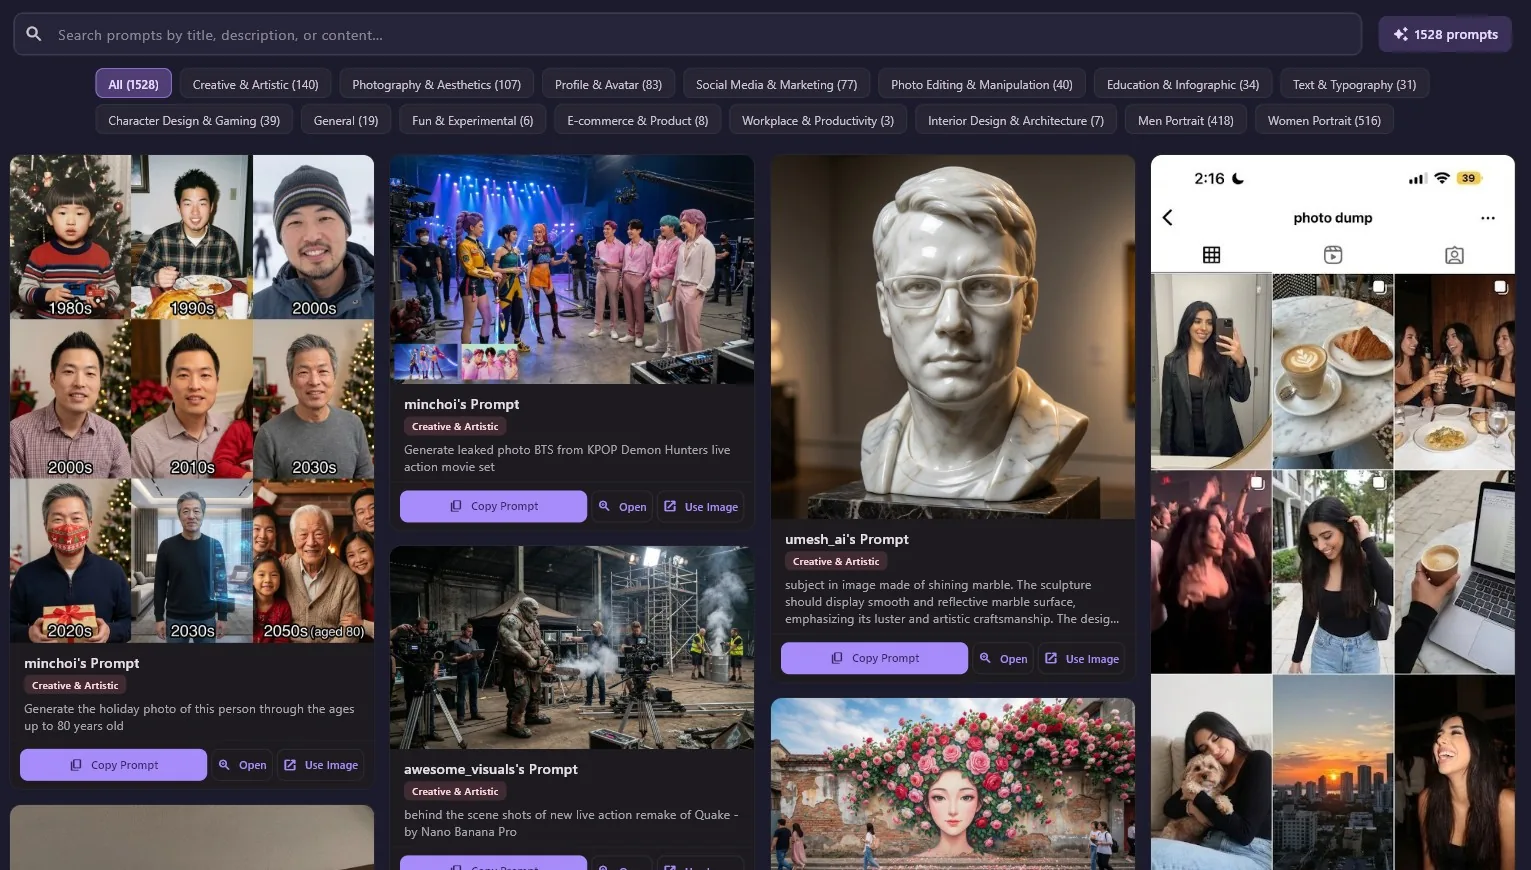
Prompt Libraries
Search visual prompt collections by title, description, source, or category. Copy a prompt or send it into another workflow.
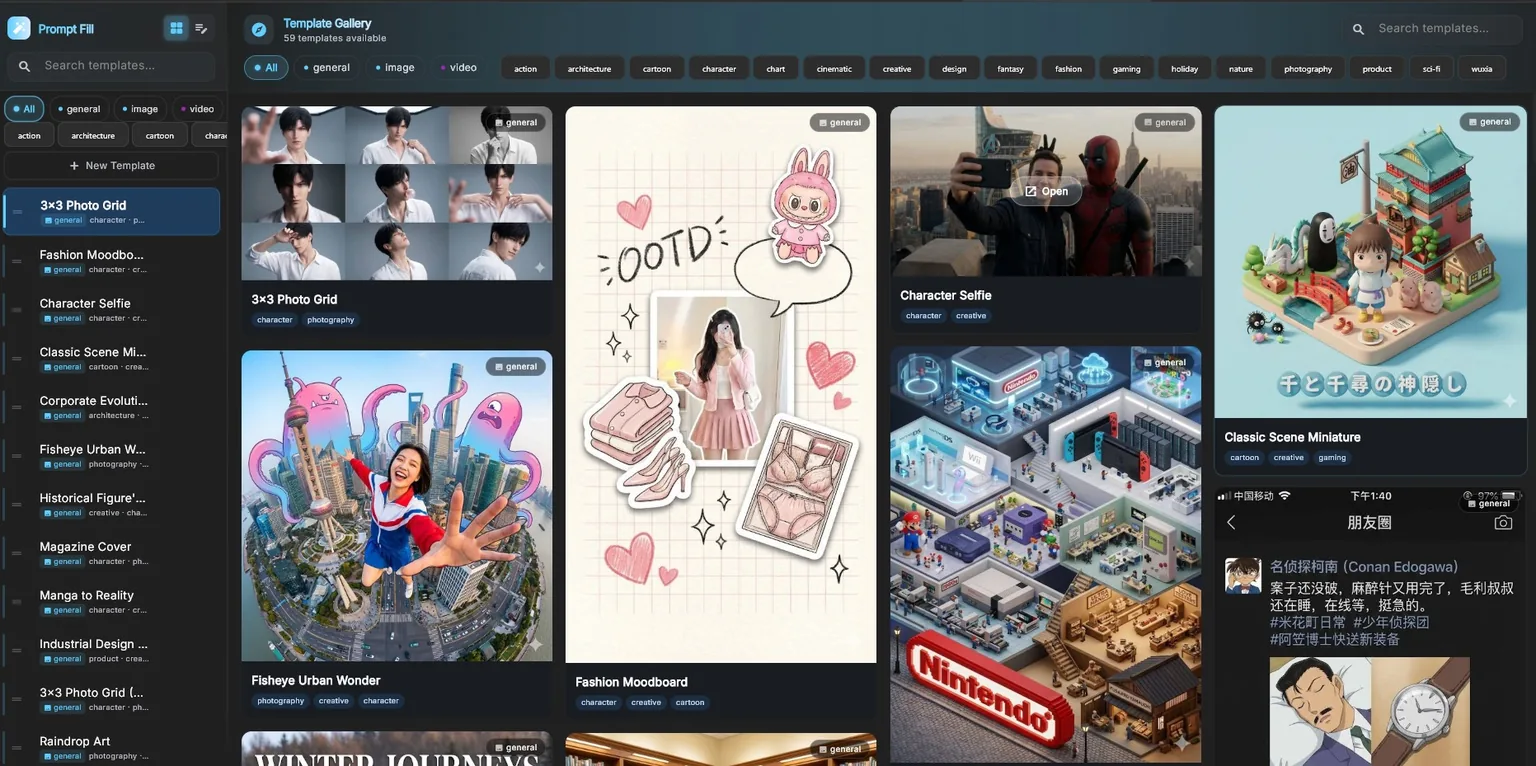
PromptFill
Choose a visual template and replace its variable chips with bank values, your own text, or Smart Terms suggestions.
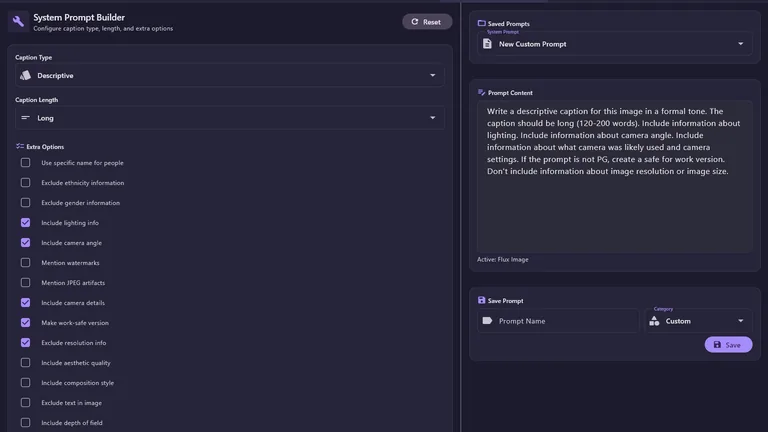
Prompt Builder and Director
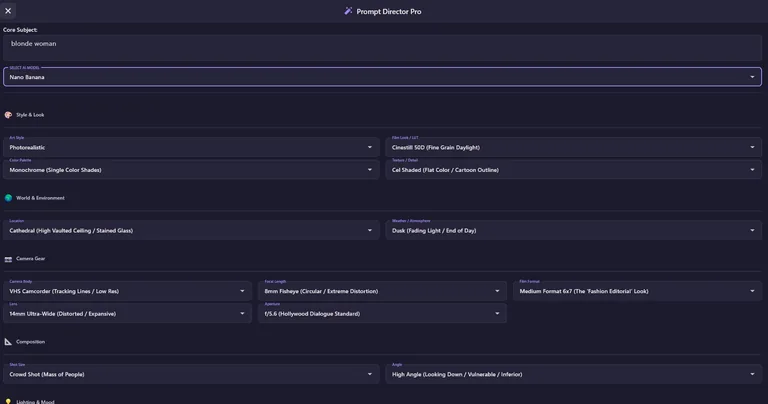
Choose style, camera, lighting, composition, motion, length, and other details with guided controls.
Prompt refinement
Use the co-creator and enhancement tools to clarify a rough concept, answer useful questions, and produce a more structured result.
More creative tools
These optional tools help when you have a larger collection, need vector output, or want more advanced guided workflows.
Bulk Analysis
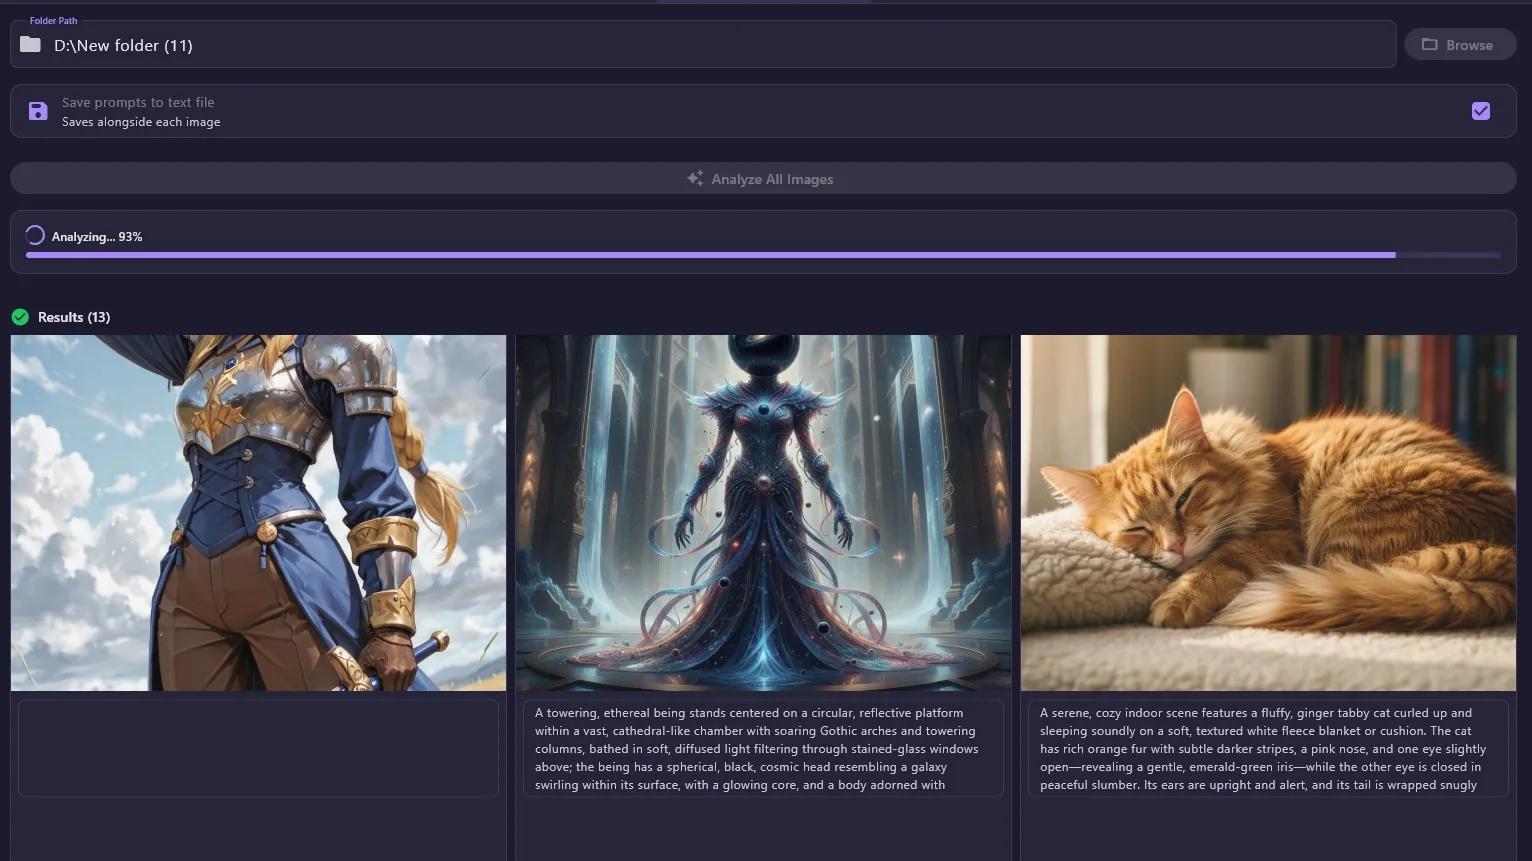
Choose a folder, analyze its images in sequence, review the results, and optionally save prompt text beside each image.
SVG Studio
Create static or animated vector artwork from text or a reference image, then export SVG, PNG, GIF, APNG, MP4, or MOV.
Local Enhancer
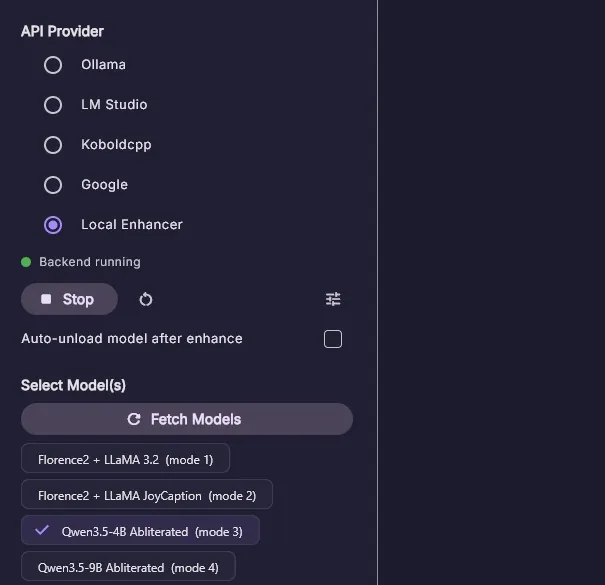
An optional offline prompt rewriting tool. It downloads its runtime and selected model the first time you use it.
Skills
Guided multi-step workflows for specialized creative tasks. Review the selected workspace and any command approval request before continuing.
Save, export, and organize your work
The app keeps different types of sessions separate so you can find an earlier conversation, generated image, video, or skill run.
- Rename, search, export, or delete chat conversations and organize them in folders.
- Save generated images, videos, and SVG exports to a location you choose.
- Copy prompt text from libraries, templates, generated media, or chat responses.
- Use separate image, video, chat, and skill histories to return to earlier work.
Providers, privacy, and local storage
AI Prompt Assistant gives you control over how a request is processed. Privacy depends on the provider you select for that request.
What stays on your computer
Settings, conversation history, prompt collections, session records, and saved application data are organized locally.
What an online provider receives
When you use an online provider, the prompt and any media required for that request are sent to that provider under its own terms.
Choosing a provider
Use Free for quick experiments, a local provider when you prefer local processing, or an online provider when you need its specific models and media features.
By default, application data is stored under your Documents folder in Documents/ai_prompt_assistant
Troubleshooting and updates
Most problems are caused by a provider that is not connected, a missing model selection, an unavailable model, or a required media service.
No models appear
Confirm the provider is selected and connected, then choose Fetch Models. For a local provider, start its server and load a model first.
A request fails
Check the selected model, API key or Free Route, internet connection, provider availability, and any rate or account limits.
Video generation or upload fails
Confirm that the selected provider supports the chosen video workflow, the file type is supported, and the account has the required access or quota.
Local Enhancer does not start
Allow the first download to finish, confirm enough disk space is available, and try updating the Local Enhancer runtime from its settings.
Updates and support
Use the in-app update notice or the official release page for new versions. Release notes describe recent changes, and the website contact page is available for support.